
Hide
How to add images to nodes
hide
Hide
Help and Guidance 2021: Modified Page: Version 1.1
Under revision
Hide
Introduction
There are two different ways in which we hold media items within nodes:
Church and some place nodes
In church nodes and in place nodes where in just a few cases an image is used instead of the Leaflet map based upon the associated gazetteer entry. This uses the common dialogue for adding images from the media library or for uploading new ones. The styling of these image types is configured in the node definition and there is no option to choose a different style.
Adding media within text fields
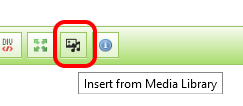
To insert media with a normal text field you click at the point where you want to insert something and click the 'Insert from Media Library' icon That brings up a popup to let you add images from the media library or for uploading new ones. Once you have selected one, or uploaded a new one and added the descriptive fields you can then specify the position or styling for that item. Above the image there will be a 'Edit media' button. Click that and within the popup choose the position, left, right or centre. Ignore the Caption option and below that is the Display menu where if it is an image you can choose the styling to be used. Basic ensures it shows the image using the original size. The ones you are likely to want to consider using are the Responsive ones which resize the image according to the size of the window being used to view them. Wide give a big image whilst Narrow a much smaller one. The size of the original image is likely to influence your choice. Click Save when you have made your choices.
Here is a step by step example.
To add an Image to a Page
These instructions assume that you already have a suitable image prepared and saved in a convenient place on your computer.
- Log in here
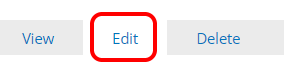
- Open in your browser the page you wish to edit and click the Edit tab.
- Place your cursor at the place you wish to insert your image and click the Media Library icon
- Click the Browse button, select your previously prepared image and click Open.

- Your image will appear. If you wish to centre it, click the Centre icon. You can adjust the size by dragging one of the black square "handles". Hold the Shift key down at the same time to maintain its proportions.[*****to be corrected****]
- Save your work by clicking the Save button near the top of the page.
 TIP: To get to the top of the page quickly, click Home.
Selecting image sizes and formats
How images display in the final page depends on the original format and size of the image and on the setting applied to the inserted media item. This is explained here